
motoG5Sを05/23に買って次の日にbootloaderのアンロックをして、TWRPを焼いてMAGISKでルート化しました。
その後セキュリティパッチが降ってきたのでアップデートしたらWi-Fiが繋がらなくなったりしてなんだか調子悪くなってしまった。
設定とか見ても直る気配がないのでファームウェアから入れ直して再起動かけたら文鎮に・・・
ボタン押しても全く反応しない。
xdaを見てみるとBlank-Flash for Montana | Moto G5Sと言うページが見つかり、そこでは文鎮を復活させるために色々テストが行われていた。
ってことでその時はまだ復活させられなかったので、毎日のように更新をチェックしてました。
一週間たっても進展しないので諦めて違うスマホ注文してしまった・・・
そこから一週間後にもう一度見てみるとスレットのタイトルがHow to unbrick Montana xt179x brickedに変わってる!!!!
早速試してみると、なんと復活させることが出来ました!!!!
ってことで自分用のメモ。
●文鎮から復活させる
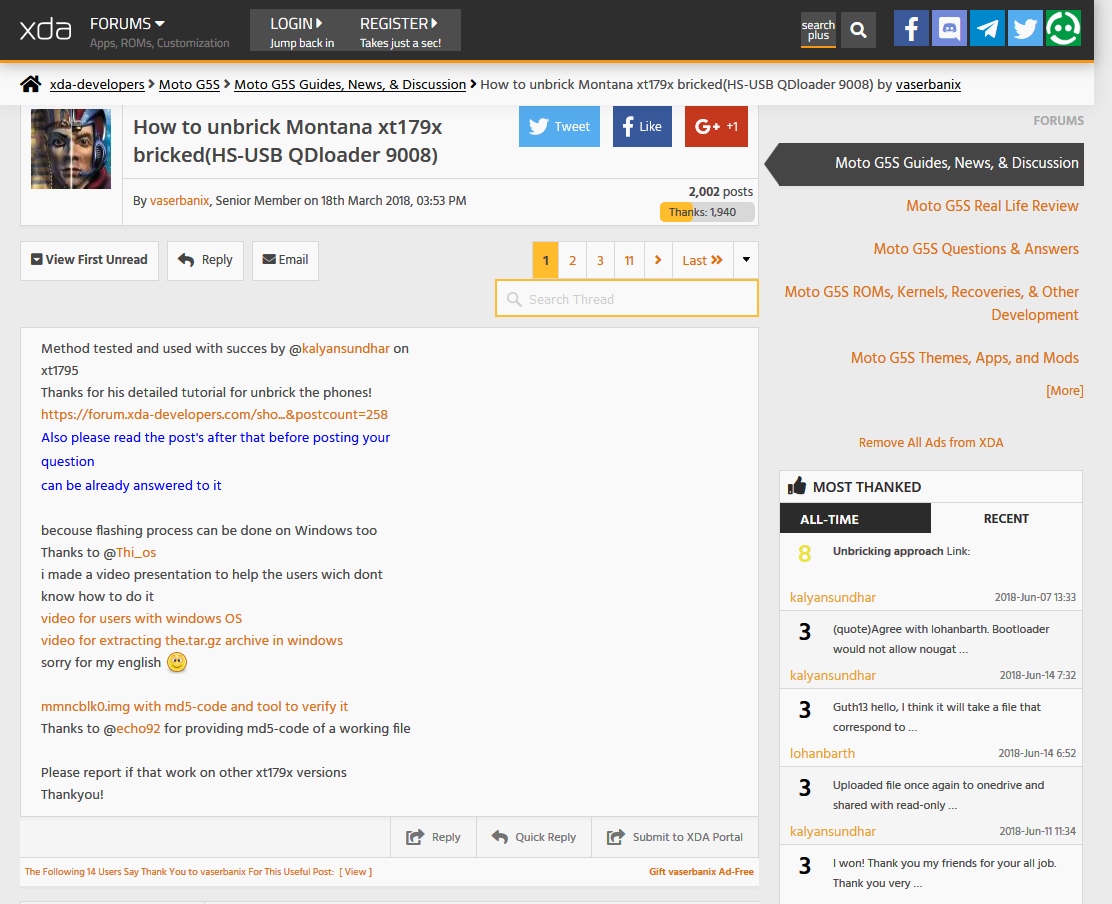
How to unbrick Montana xt179x bricked(HS-USB QDloader 9008)
https://forum.xda-developers.com/moto-g5s/how-to/blank-flash-montana-t3765150
※ダウンロードするファイルはページに飛んで最新のものをダウンロードする。
Steps to follow in computer:(PCでの手順)
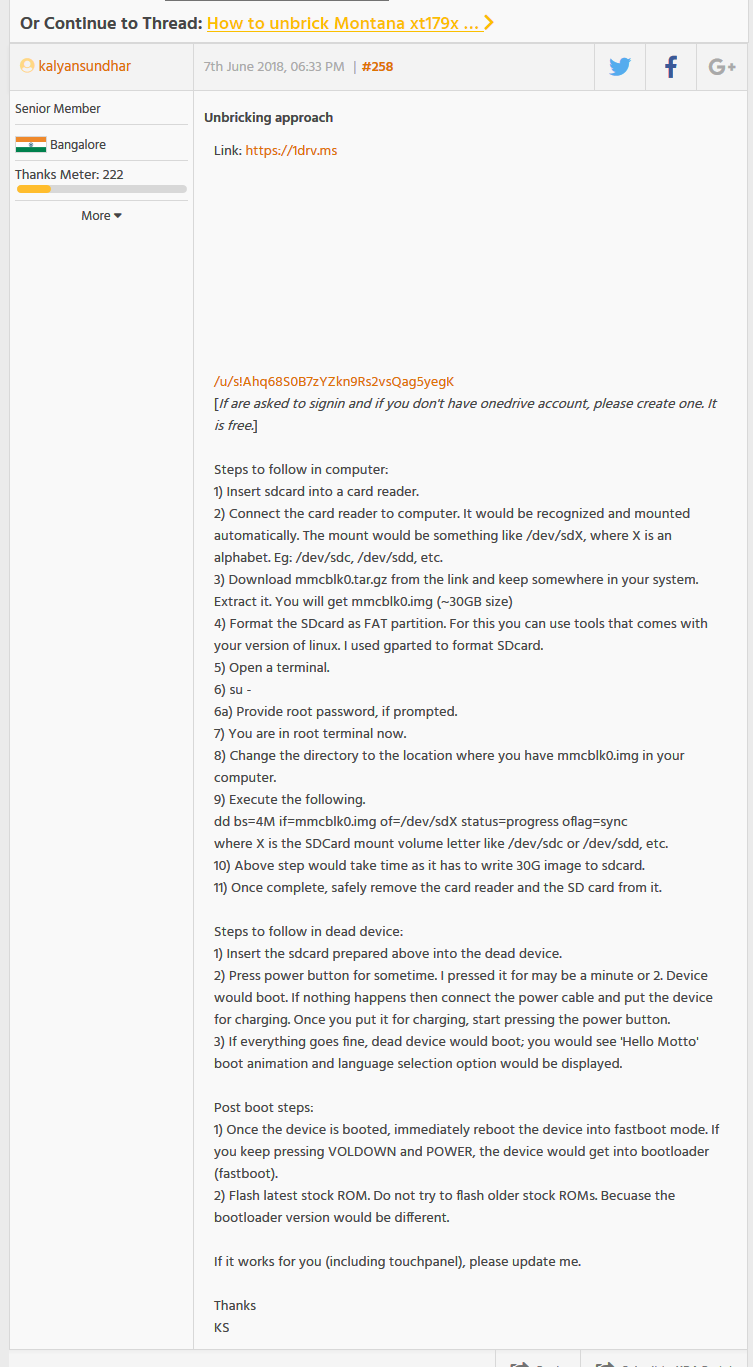
1) Insert sdcard into a card reader.(カードリーダーにsdcardを挿入します。)
2) Connect the card reader to computer. It would be recognized and mounted automatically.
The mount would be something like /dev/sdX, where X is an alphabet. Eg: /dev/sdc, /dev/sdd, etc.
(カードリーダーをコンピュータに接続すると認識され、自動的にマウントされます。)
3) Download mmcblk0.tar.gz from the link and keep somewhere in your system. Extract it. You will get mmcblk0.img (~30GB size)
(リンクからkalyansundhar-mmcblk0.zipをダウンロードし、解凍してmmcblk0.imgを取り出す。)
4) Format the SDcard as FAT partition. For this you can use tools that comes with your version of linux. I used gparted to format SDcard.
(SDカードをFATパーティションとしてフォーマットします。 )
5) Open a terminal.
6) su –
6a) Provide root password, if prompted.
7) You are in root terminal now.
8) Change the directory to the location where you have mmcblk0.img in your computer.
9) Execute the following.
dd bs=4M if=mmcblk0.img of=/dev/sdX status=progress oflag=sync
where X is the SDCard mount volume letter like /dev/sdc or /dev/sdd, etc.
10) Above step would take time as it has to write 30G image to sdcard.
11) Once complete, safely remove the card reader and the SD card from it.
※5~10は行わず rufus(https://rufus.akeo.ie/?locale=ja_JP)を使ってmmcblk0.imgをSDカードに焼いて起動カードを作った。
Steps to follow in dead device:(デバイスでの手順)
1) Insert the sdcard prepared above into the dead device.
(準備したsdcardをG5Sに挿入します。)
2) Press power button for sometime. I pressed it for may be a minute or 2. Device would boot. If nothing happens then connect the power cable and put the device for charging. Once you put it for charging, start pressing the power button.
(電源ボタンを押してください。 私はそれを押して1分または2かもしれません。デバイスが起動します。 何も起こらない場合は、電源ケーブルを接続し充電したら、電源ボタンを押す)
3) If everything goes fine, dead device would boot; you would see ‘Hello Motto’ boot animation and language selection option would be displayed.
(すべてがうまくいくと、デッドデバイスが起動します。 「こんにちはモト」の起動アニメーションが表示され、言語選択オプションが表示されます。)
※簡単に書くとSDカードを入れたらパワーボタンを起動するまで押し続ける。(数分)
Post boot steps:(次の手順)
1) Once the device is booted, immediately reboot the device into fastboot mode. If you keep pressing VOLDOWN and POWER, the device would get into bootloader (fastboot).
(デバイスが起動したら、すぐにデバイスをfastbootモードで再起動します。 volume down + powerボタンを押し続けていると、デバイスはbootloaderに入ります(fastboot)。)
2) Flash latest stock ROM. Do not try to flash older stock ROMs. Becuase the bootloader version would be different.
(最新のstock ROMを焼く。 ブートローダーのバージョンが異なるため古いROMをフラッシュしないでください。)
※OSが起動して言語を選ぶ画面まできたらvolume down + powerボタンでブートローダーを立ち上げファームウェアを焼き直す。
●ファームウェアを焼きなおす。
Flash official firmware Moto G5s [MONTANA_NPP26.102-49-8]https://forum.xda-developers.com/moto-g5s/development/flash-official-firmware-moto-g5s-montana-t3687768
1.Download Moto G5s Stock Firmware from below (in download section).
2.Install Motorola Driver and ADB Fastboot Driver on your PC.
3.Now extract stock firmware in ADB Fastboot folder.
4.Now, turn off your device and boot into bootloader by pressing volume down button +power button simultaneously.
5.Now, connect your device to your PC via a USB Cable.
6.Open a command prompt window and type the following commands:
※ダウンロードするファイルはページに飛んで最新のものをダウンロードする。
※ADB Fastbootやドライバー類のインストールを済ませておく。
flash_rom.bat.zipをダウンロードして解凍。
MONTANA_NPPS26.102-49-8_cid50_subsidy-DEFAULT_regulatory-DEFAULT_CFC.xml.zipをダウンロードして解凍。
中身をflash_rom.batフォルダーに入れる。
volume down +powerでbootloaderを立ち上げてPCに繋ぐ。
そのフォルダーでshift+右クリックで「コマンドウインドウをここで開く」を選ぶ。
次のコマンドを打ち込んでいく。
mfastboot getvar max-sparse-size
mfastboot oem fb_mode_set
mfastboot flash partition gpt.bin
mfastboot flash bootloader bootloader.img
mfastboot flash modem NON-HLOS.bin
mfastboot flash fsg fsg.mbn
mfastboot flash dsp adspso.bin
mfastboot flash logo logo.bin
mfastboot flash boot boot.img
mfastboot flash recovery recovery.img
mfastboot flash system system.img_sparsechunk.0
mfastboot flash system system.img_sparsechunk.1
mfastboot flash system system.img_sparsechunk.2
mfastboot flash system system.img_sparsechunk.3
mfastboot flash system system.img_sparsechunk.4
mfastboot flash system system.img_sparsechunk.5
mfastboot flash oem oem.img
mfastboot erase cache
mfastboot erase userdata
mfastboot erase DDR
mfastboot oem fb_mode_clear
mfastboot reboot
立ち上がれば成功。
自分の場合はこの手順で無事に復活出来ました!
運良く復活出来ましたがこの手順でやっただけなので質問もらってもお答えできません。
もし書き込みがあってもスルーすると思いますよ~